Sunday, July 31, 2011

A Little Dish of Sweet Turnip

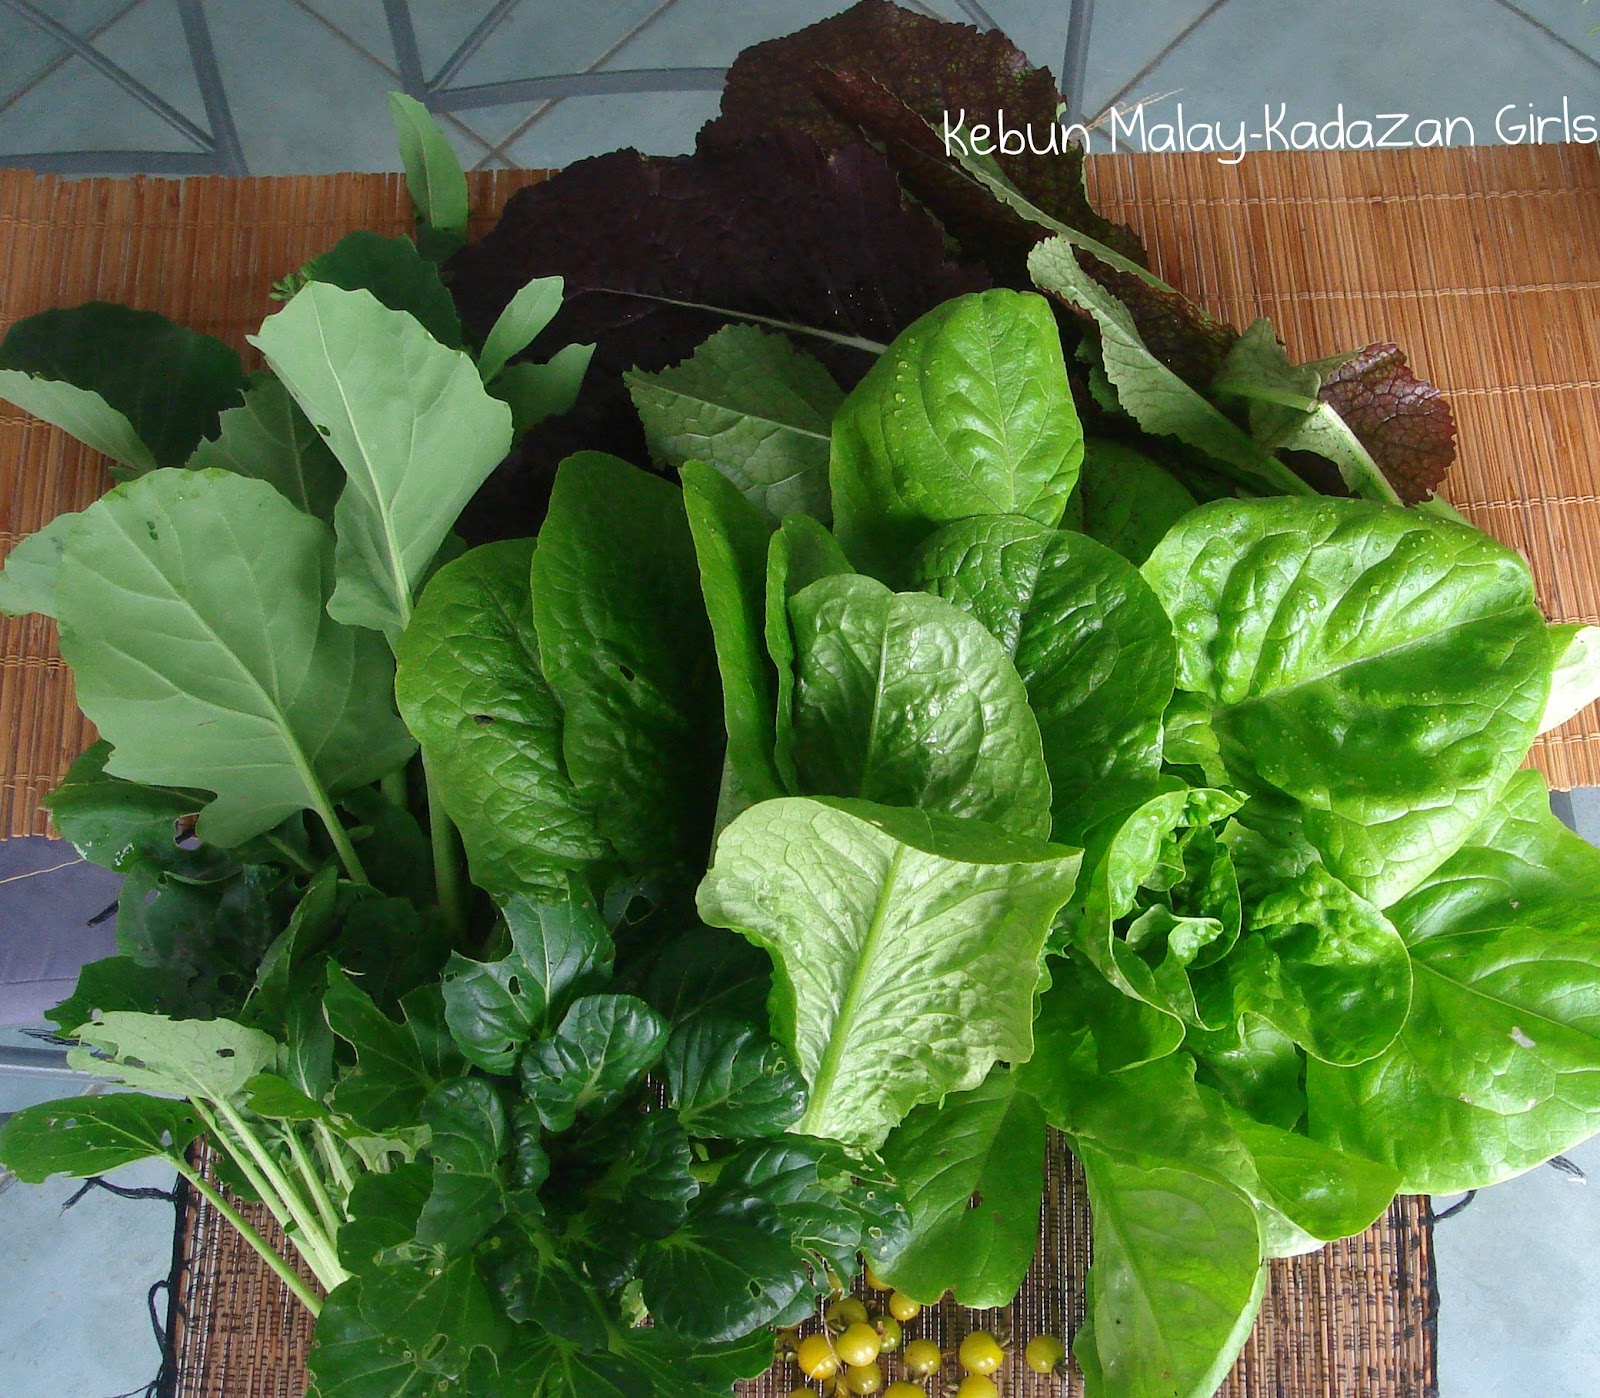
I always thought turnip was one of the easiest vegetables to grow for a novice to begin with. Unfortunately after having my own experience at growing turnip, not that easy if you don't have enough water or not much rain at our small garden. The seeds germinate easily and grow fast.
I thought that turnip form globe root very fast almost like radish pace. But ours seems not to want forming globe root. Our turnips just do nothing but grow lush leaves. Then after long anticipation, most of the time our turnips seems to be more fond of growing long woody root rather than globe root.
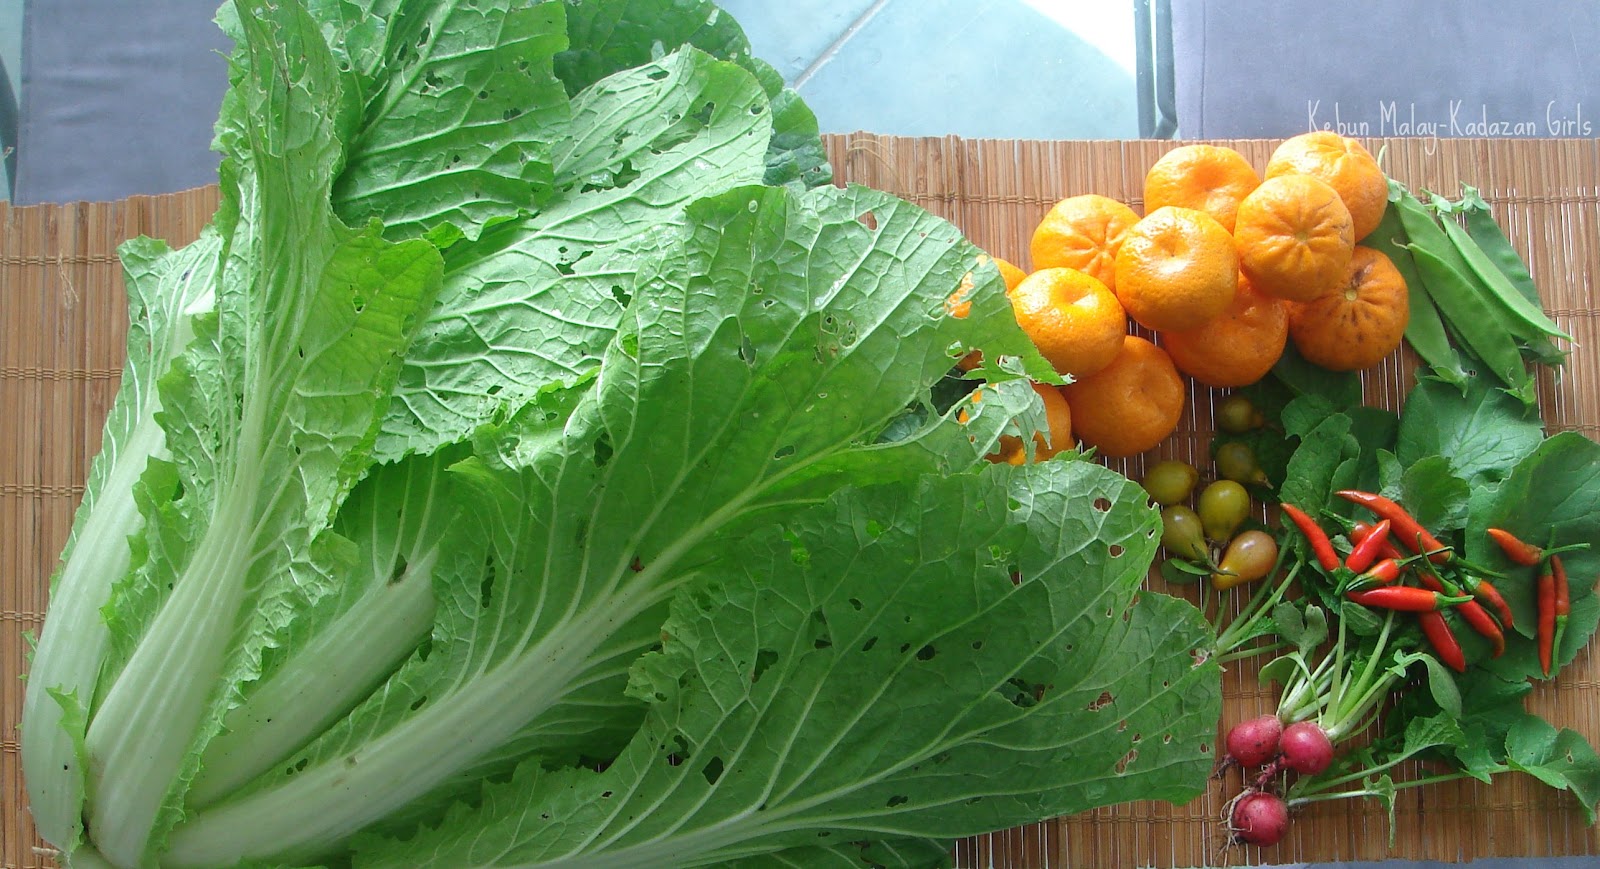
So when I spy some of those turnip roots look like the size of S size chicken eggs after waiting for more than 3 months, I am most determined to harvest them quickly before it becomes woody. Is it normal for turnip to form roots after 3 months or it should be much much much earlier? This is 'snowball' variety.
The first time that I known that in this world a vegetable called "turnip" exist was when I was studying in Japan. I was teaching Malaysia language part-time at Japan and one of my student said that it is kabu season now (kabu is turnip in Japanese). So of course my students will want to know what turnip is called in Malaysia language. It made me sweat a little, after a very detailed description from my beloved students I knew that it is turnip. However, until now I still don't know whether we have any specific name for turnip in Bahasa Malaysia (does anyone know?). I tried to translate it in google translator but resulted as "orang bodoh" meaning idiot. 
Harvested those tiny turnips and I don't have any ideas to prepare it.Nigel Slater came to the rescue again with his simple ' A little Dish of sweet turnip" recipe from his book Tender.I like simple dishes because with food that comes fresh from the garden we don't have to worry about the taste that much. Just enjoy as much of its original flavour to really enjoy the food that we grow. Saying that, I have to be honest that I still avoid eating raw vegetables (Still in learning process to get used of eating raw vegetables).
I think it takes less than 30 minutes to prepare this simple dish to enjoy with roast bird which we did. Quoting Nigel " The contrast between the sweet outer shell and slightly bitter turnip is astonishing with roast game birds".
Drop tiny turnips into lightly salted boiling water and cook for 10 minutes or so until tender.Drain.
Melt a thick slice of butter in a shallow pan and add the turnips and a spoonful of sugar.
Cook over medium heat, shaking the pan from time to time, until the little orbs are glossy and sweet.
I decided to pop in uncooked pink radish together too. I am still avoiding raw radish. 
Not sure how the end process of the dish suppose to look like because there were no photos.
However, it was a nice dish.
Selamat Berpuasa.

Saturday, July 30, 2011

Detik-Detik Daikon (Lobak putih)

We are having a break from daikon at the moment. Lenay just sow some daikon seeds yesterday, which I planned for 1 row but she made 2 rows. Not that many anyway, there were only total of 8 seeds sowed. We are not sure whether it will germinate this month but we just give it a go anyway. We probably sow another small batch in another 2 weeks, succession sowing is the main goal here so we don't have a glutton of radish again like last fall. But sow some we must to fill in the gap when harvest is scarce while waiting for summer vegetables to produce. Hoping that by mid-end spring that it will be ready.
Since daikon seeds usually germinate less than one week, we probably know next week whether radish tolerate our weather at the moment or not. Wish us luck! If we have luck I might try turnip next. Turnip is one of the vegetable that I have not much success with it yet.
Daikon grows very fast. We direct-sowed daikon, carrot and parsnip on the same day.You can see daikon has grown very fast, follow by carrot and very slow to grow parsnip. I usually don't bother to thin our daikon at this stage.
Oppss, daikon grow so fast I could not catch up...hehehe...its time to thin them.
Daikon thinnings. 
Some space for other daikons to grow bigger. Daikon is good to break the soil if you have hard soil. If you see your daikon root are high above the ground, shows that those daikon root has reached the hardest soil under ground.
Have a nice weekend!
Due to poor posture working many times in front of the microscope this week, I am having back pain.
Will be blog walking again after a bit of rest.

Wednesday, July 27, 2011

Ilhan Sweet corn Sweet Farewell

Finally we had some free time last Saturday after lunch to celebrate my birthday to harvest all of Ilhan sweet corn.  Ilhan sowed sweet corn seeds last March when we were in Melbourne for Rayyan cardiac surgery. We were not sure whether we got to harvest any ripe sweet corn in winter. But I was hoping for an alternative to grow sweet corn here in Adelaide other than summer. Each year when we sow sweet corn seeds in spring it grow so nice and promising. However when the tassel and female silky hair appear, heat waves come and all the important part of the plant got burn to crisp. The last batch of sweet corn harvest from Ilhan patch from looking at it was not that bad.
But I noticed some of the female gone bald.
Something must have given some of the female silky hair a haircut.
Found the culprit. Many of them at Ilhan patch.
We pull out all sweet corn plants and dig it into the patch. So it will decomposed and return some of the nutrient back. Horse manure was also added. Before we grew sweet corn there, sunflowers that were growing were dig into the patch. We did not saw any trace of sunflower in the soil. We did get a few self-sowed sunflower though. The soil was not as hard as the first time we prepared this patch.
My backyard neighbour that gave me mandarins also gave me many seed potatoes to plant. When he gave me those mandarin, I went back into the house and search for something I can share with him too. I went back to his garden and gave him some red chillies and a small young Chilean guava tree that I received from our gardening friend. I was so happy that Chilean guava tree has finally find a better home and will be cared really well. In this small space we have here, I could not possibly grow that Chilean guava tree with the space it needs to grow. The first time I visited our backyard gardener neighbour, I knew instantly that Chilean guava tree will be perfect in his plot. Maybe he was happy too, because I received many seed potatoes ready to be planted. I have faith that this potato will grow very well since he probably has been gardening before I was even born. A very lovely birthday present.
After we prepared this patch, we planted these potatoes at the middle of this patch. There are 2 very tall sunflowers near the fence. Lenay tied strings between this 2 sunflower plants for direct-sowed snow peas to climb later on. We transplanted some onion seedlings at the front area of this patch. There are some self-sowed evening sunflower on this patch which has not yet bloom. I guess this is my birthday patch and hope to received some present from it around Christmas.
Some of Ilhan sweet corns. Although there are not as perfect as the shop ones,it tasted very sweet.  Some of these sweet corn kernels were frozen. The ones with bald female had short cobs but full kernels as seen in the photo. Well better than nothing, although less than half the normal size.
This post is for Ilhan when he is big he can't complain to me he can't grow things. He already grow sweet corn at the age of 4 years old. So he has confidant on himself when he is not a boy any more and starts his own garden with his family.

Monday, July 25, 2011

Mid-Winter Fresh Food

Every day as August come closer, I get a bit worried that the amount of vegetables that can be harvested from our garden decreases. Well, that would be expected its already middle of winter. Moreover, I sowed and transplanted cool season vegetables rather late this year compared to previous year. But we should count ourselves lucky as we still have fresh harvest flowing to the kitchen as we have not even rely on our frozen vegetables as yet. We still have peppers slowly ripening for us which is a nice treat. Little Rayyan broke one of our capsicum branches so we had to harvest 3 green capsicums. Cherry capsicum managed to mature, although it hardly received any suns at the moment. We got to harvest some sprouting broccoli too this week. There are still some yellow cherry tomatoes from the garden.
Some of the greens that were harvested last week~Baby kailans, purple mustards, loose-leaf lettuce and self-sowed cos lettuce. I did not noticed at first that some of our garden containers had self-seeded lettuce seedlings popping out. I thought it was weed at first until those seedlings grow bigger. Harvested some tatsoi, but it look really bad almost bald without leaves. We inter-planted tatsoi with cauliflowers. Those cauliflowers were saved from having the same fate as tatsoi which has been sacrificed to pest.
I got some mandarin from my backyard neighbour who grows vegetables and have some olive trees in his garden. He makes his own olive oil and every fall I watched him gather olives with his family from inside the house. Sometime, if he is alone I worry he will fell down from the tree. I was surprised last week he invited me to see his garden. We are usually shy and won't go out to garden at the other side of our backyard if anyone is there. But I have overcome my shyness a little bit and greet him whenever he come to visit his garden.  When I visited his garden, he offered me some mandarin and at first I was too shy to accept. Since he insisted and I was curious (malu-malu kucing) how fresh mandarin tasted like, I took some back home. Those mandarin was so juicy. We harvested our last wong bok (Napa cabbage) that was grown in container last week.  It was about to bolt.
What vegetables is popular in your kitchen at the moment?

Sunday, July 24, 2011

Talam Labu/Sweet Potato

I was really hoping that this weekend it will be sunny and I can complete the task that I set this week in the garden. However, it rain in the morning. So we decided to make Malaysia traditional cake~ kuih talam labu (pumpkin) or talam keledek (sweet potato) while waiting for the rain to stop. Talam in Bahasa Malaysia means tray. What interesting about this recipe that it can use either pumpkin or sweet potato as its main ingredient. Since we still have some pumpkin that we harvested from last autumn and recent harvested sweet potato we decided to try both. I got this recipe from Iyajuyi author of ARAH blog.

Ingredients :
For the bottom layer
300gram sweet potato/pumpkin (boiled/steamed and mashed)
75gram rice flour
75gram tapioca flour
150ml coconut milk + 150ml of water
200~150gram sugar
1teaspoon salt
1/2 teaspoon vanila essense (optional)
colouring (optional) the pumpkin one I did not use any colouring but for the sweet potato I added colouring for the layer which contain only coconut milk. Sweet potato did not give any colour. But pumpkin has its own natural colouring.

For the Top layer
100gram tapioca flour
200ml coconut milk + 200ml water
2Tablespoon rice flour
1Teaspoon salt

Preparing for the bottom layer:
Mix well rice and tapioca flour with coconut milk. Then sieve.
Blend all the ingredient together including mashed pumpkin/sweet potato.
Put the mixture into a pan and stir until it gets concentrated at moderate heat.
Pour the mixture into a container that fit your steamer with half fill in the size of that container. Beforehand, brush the container with very little oil. Steam for about 7 minutes.
Time to prepare the top layer which is the similar process with the bottom layer.
Pour the top layer mixture on top of the bottom layer. Steam for about 10 minutes.
Let it cool. Then cut and its ready to serve.
It actually will look much more prettier if I have an artistic talent on how to cut and make it more presentable. But it tasted very good. You have to take my word because I usually got C in art class. The bottom layer is sweet potato which does not have any colour add on. 
This is talam labu (pumpkin).
The top layer are pumpkin which does not need to add yellow colouring, it is on its own natural colour.
I prefer talam labu more.
How about you?
Hope you had a great weekend.
Please join us!

Saturday, July 23, 2011

Rainbow Chard~My First Gratin

This is the first time we tried to grow rainbow chard and we have never eaten it before. I don't think this vegetable is something you often see at the market vegetable rack either. I have seen silverbeet at our local market but not rainbow chard. I got rainbow chard seeds from one of our local seed-saver group meetings. I am not sure whether this plant can grow in our cold season so it was a gamble which this gardener has to make. Fortunately we got lucky. 
Rainbow chards seedlings.
Some of our rainbow chards which are growing at the front of potato plants. Plant too many rainbow chard last fall, I guess I got too excited on planting it for the first time. The plants are scattered in different places. I was surprise that the chards were relatively almost pest-free. I don't need to look after them like the brassicas. But what I did noticed about rainbow chard that it does not grow well in partial shade compared to brassicas which is more tolerant. 
I did not have the time to learn other way to cook rainbow chards, other than chopping them for fried rice or stir-fry. But I decided to become more adventurous and try using our oven more often this month. I am more comfortable using a wok rather than the oven. So I found this gratin recipe that look simple enough for a beginner like me in the world of gratin to prepare. Moreover, this is the first time I use heavy cream for cooking and making a gratin dish. Many first time experience for me in this winter season. Its already middle of the year and I am hoping many of my like-to-do list in 2011 will be tick off.
This recipe is from Nigel Slater the author of Tender (A cook and his vegetable patch) cookbook.
Rainbow Chard Gratin (enough for 4) 
Rainbow Chard stems and leaves (450gram)
Whole-grain mustard (a tablespoon)
Heavy Cream (400ml)
Grated Parmesan ( a good handul)

Preheat the oven to 180 degree Celsius.
Cut the chard leaves from the stems. Chop the stem into shorter lengths, then cook briefly in boiling, lightly salted water until crisply tender.
Dip the leaves in the water briefly, until they relax.
Drain and put them in a buttered shallow ovenproof dish.
Put the mustard in a bowl and stir in the cream and a grinding of salt and black pepper.
Pour the seasoned cream over the stem and leaves, cover with grated Parmesan, and bake until the top has a light crust the colour of honey.
Ready to put in the oven.
I was so worried how this gratin will cook that I kept on peering into the oven.
Then I had to worry about whether all the members on the dining table will enjoy this dish or not.
It was a hit, everyone enjoys it.
What surprised me the most is to watch my husband having third servings!
Because he usually does not eat a lot of vegetables compared to other family members.
Sometime I purposely serve him a lot of vegetables because I know he won't have seconds.
So gratin will make more appearance in our kitchen now.
Any share ideas on how to prepare rainbow chard?

Friday, July 22, 2011

Purple Pleasure

About a week ago, I found some cheerful yellow things in our garden and make all of you guess what it is. So this week, I wonder if I can find purple things in our garden in this mid-winter season. Pleasantly happy that there are several purple things in our garden at the moment. Purple sunflower seeds that I left to dry (not sure whether it will properly dry in this weather though). See some gaps in the sunflower head? I was snacking on them. The seeds were fat, creamy and sweet. I was really tempted to not let them dry on the plant and have them for snack while I entertain my boys in front of the television.
Purple podded peas starting to bloom last week. I hope its not too early for them to set proper pods. The plants have climbed to 2 metres tall.
The only bloom on our tree dahlia. Many buds still but not blooming. Too cold may be.
Established polyanthus in our garden has started to bloom at the shade corner of our garden.
Sweet alyssum seems to bloom all year round here. But in winter we keep them contain in container. Because snail and slugs like to hide under bushy sweet alyssum plant during winter.
Hoping to harvest some kohlrabi next month.
Giant purple mustard which is as tall as our biggest Italian sprouting broccoli plant which is producing side shoots. We won't be eating this mustard as I don't think I will be able to swallow it because it is already very hot and bitter this big. I am going to let them flower. I like how the green stalk, vein and purple leaves look so striking against each other. This mustard is about 70cm tall now. At the back of this mustard is our more than 2 years old pepper hiding and protected by the cold wind with the help from this mustard.
Any purple favourite thing in your garden at the moment?

Thursday, July 21, 2011

From the Temple of Japan~Carrot Croquettes

I got this Carrot Croquettes recipe from 'The Enlightened Kitchen' (Fresh Vegetable Dishes from the Temples of Japan) by Mari Fuji. This recipe book is based on the centuries-old vegetarian cuisine of Japan's Buddhist temples which is very interesting and healthy. What interesting about this croquettes that it uses tofu and peanuts instead of usual mashed potato mixed with ground meat for protein. This croquettes will look very good in bento (lunchbox). The key to making this dish is the removal of all excess moisture from the tofu.
Our weird looking Afghanistan carrots were the main star for this dish.
Short middle size shaped carrots were saved for Rayyan as a dummy (puting in Malaysia Language). Preventing him sucking on his fingers until its red and blister under supervision while cooking these days. Hopefully that way he will have more nutrition intake instead. He likes to chew the carrots which is good.
Ingredients:
1 Block Firm tofu (450gram)
300gram carrots, peeled and sliced into thin half-rounds
1 teaspoon salt
2 Tablespoon crushed peanuts (or roughly chopped walnuts)
2 Tablespoons cornstarch
All-purpose flour, for dusting
40gram all-purpose flour, mixed with 3 tablespoon water
1 cup (60gram) dried breadcrumbs
Vegetable oil, for deep-frying
1 Lemon or lime, cut into wedges 

Wrap the tofu in a paper towel or tea towel, place a plate on top and refrigerate for 30 minutes to remove excess moisture.
Boil the carrot for 10minutes in just enough water to cover until soft, then drain. Return the carrots to the pan and place over low heat until any remaining liquid evaporates, then mash.
In a bowl, combine the tofu, crushed peanuts, mashed carrots, salt and cornstarch and mix well. 
Make oval-shaped croquettes and dust evenly with flour.
Coat the croquettes with the flour-and-water mixture, dip in the breadcrumbs and deep-fried until golden brown.
Our first happy customer.
A peek inside.
Good healthy food for picnic with the family.
There are many interesting dish I would like to try to make from this recipe book but I can't find dried konbu in any Asian grocery stores. Many of the recipe need konbu stock as the based ingredient.

Wednesday, July 20, 2011

How to make edible BOMB~Winter Wednesday

This is a fun and easy Malaysia traditional cake that children can participate in the making at the kitchen. In Malaysia it is known as 'Kuih Bom Keledek' which literally translate as Sweet potatoes Bomb Cake. It is quick to prepare about 45 minutes (psst...my first time). Maybe less for a pro. I got the recipe from CikManggis. CikManggis said not to worry as it won't explode. I am obsess about sweet potatoes this week since we harvested some last weekend. In this cold winter weather,working in the kitchen looks more inviting than the garden at the moment. This cooking made enjoyable teatime of hot bombs and hot tea in this cold middle of winter season. Lets make some bomb.
Ingredients:
80 gram of mashed sweet potatoes (boiled)
120 gram glutinous rice flour
20 gram flour
35 gram castor sugar
a pinch of salt
100ml water
sesame seeds
grated coconut (you can also use red bean paste/adzuki bean paste)

Mix all the ingredient above except for the sesame seeds and grated coconut. Knead the dough  until all of the ingredients well incorporated. Make a round bomb ball about the size of a ping pong ball.
Heat some cooking oil for deep-frying.
Meanwhile, make a hole and fill the bomb with grated coconut.
Make it a bomb shape again with the grated coconut safely in the middle of the bomb.
Roll the bomb on sesame seeds to cover the whole bomb with it.
Fry the ball until golden brown.
CikManggis got 12 bombs and I got 14 bombs.
How many bombs did you got?


Please join us!